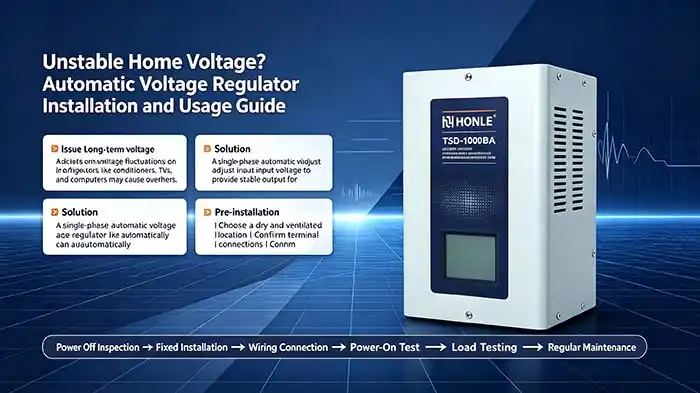
How to Install a Single Phase Automatic Voltage Stabilizer at Home | Honle

 Site Editor
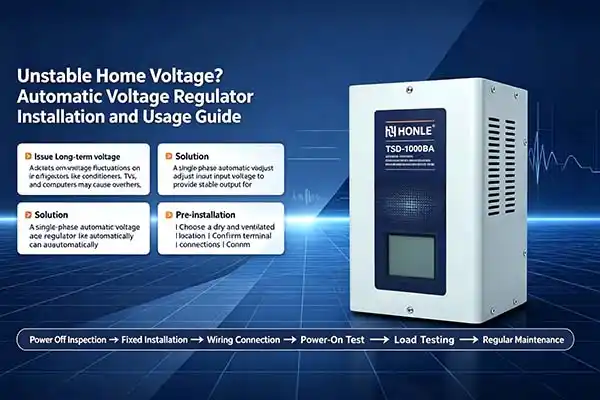
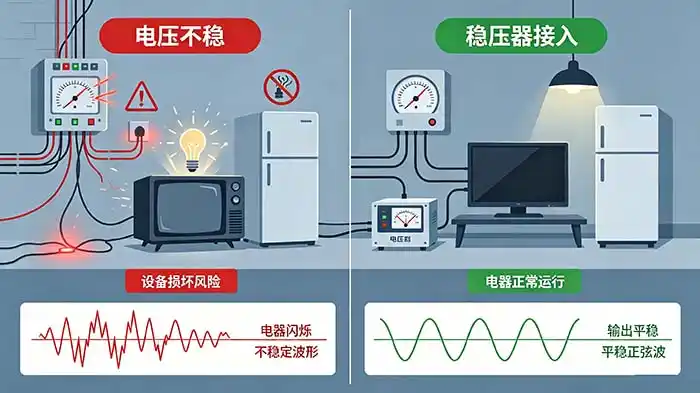
Your refrigerator cycles on and off throughout the day. Your air conditioner runs during the hottest hours. Your television, computer, and microwave all draw power from the same electrical grid—a grid that doesn’t always deliver a steady 220V or 230V. Voltage sags during peak demand hours can cause motors to overheat and strain compressors. Voltage surges can damage sensitive microprocessors inside modern appliances. Over time, these fluctuations accumulate, shortening the lifespan of your electronics and leading to costly repairs.
A single-phase automatic voltage stabilizer—often called an AVR—is designed to solve this problem by automatically adjusting incoming voltage to a safe, consistent level for your entire home or for specific appliances. This guide walks you through the entire installation process: from assessing your power needs and choosing the right location to wiring, testing, and avoiding common mistakes. Whether you are a confident DIYer or simply want to understand what a professional electrician should do, this guide will help you make informed decisions.
Before You Begin – Assessing Your Home’s Power Needs
Installing a voltage stabilizer starts long before you pick up a screwdriver. The first and most critical step is determining what you need to protect and how much capacity you require.
Identify which appliances need protection
Not every device in your home requires voltage stabilization. Battery-operated devices that are mains-rechargeable (like laptops and phone chargers) are generally unaffected by voltage variations—the battery acts as a natural buffer. However, appliances with motors (refrigerators, air conditioners, washing machines, water pumps) and devices with sensitive electronics benefit significantly from stable voltage.
Calculate your total load
Add up the wattage of all appliances you intend to connect. Each device has a specification sticker near the power cord or on the back panel showing its power rating in watts (W) or volt-amperes (VA). For motor-driven appliances like refrigerators and air conditioners, the starting current can be three or more times the running current. A general rule of thumb: choose a stabilizer with a capacity at least 1.5 times the total running load of your appliances. For motor loads, consider 3 times the capacity to handle startup surges.
Choose between whole-house and point-of-use protection
A whole-house stabilizer is installed at your main distribution board and protects every circuit in your home. A point-of-use stabilizer protects a single appliance or a small group of appliances. Whole-house protection offers comprehensive coverage but requires a larger capacity unit and professional installation. Point-of-use units are smaller, easier to install, and more affordable—but they only protect what is plugged into them.
For a detailed look at the types of stabilizers available for residential use, visit our automatic voltage stabilizer series page.
Choosing the Right Installation Location
The location you choose for your voltage stabilizer directly affects its performance, safety, and lifespan. Follow these guidelines when selecting a spot:
| Requirement | Why It Matters | What to Avoid |
|---|---|---|
| Indoor, dry environment | Moisture causes condensation inside the unit, leading to short circuits and failure | Bathrooms, kitchens, outdoors, areas prone to leaks |
| Good ventilation | Stabilizers generate heat during operation; poor airflow causes overheating and reduces lifespan | Enclosed cabinets, corners with no air circulation |
| Clean, dust-free area | Dust accumulation on internal components can cause arcing and poor contact | Workshops, garages with heavy dust, construction areas |
| Away from heat sources | External heat adds to the unit’s thermal load and accelerates component aging | Near radiators, ovens, direct sunlight |
| Secure mounting surface | The unit must be firmly attached to prevent vibration damage and ensure safety | Unstable shelves, lightweight drywall without proper anchors |
| Accessible for maintenance | You need to read the display, operate switches, and inspect connections periodically | Behind furniture, high locations requiring a ladder |
Additional clearances: Maintain at least 10 cm of space on all sides of the unit to allow proper airflow. For larger whole-house units, some manufacturers recommend up to one meter of clearance around the unit for safe operation and maintenance access.
The ideal location for a whole-house single-phase stabilizer is near your main distribution board. This minimizes the length of wiring between the stabilizer and your home’s electrical system, reducing voltage drop and installation complexity.
Step-by-Step Installation Guide
Once you have selected the right unit and chosen an installation location, follow these steps carefully. If you are not comfortable working with electrical wiring, hire a qualified electrician. Working with mains electricity carries serious risks of electric shock and fire.
Turn Off the Main Power Supply
Before doing anything else, switch off the main circuit breaker that supplies power to the area where you are working. Verify that power is off using a voltage tester. Never assume that a switch is off—always test.
Wait at least 5 minutes after disconnecting power before touching any internal components to allow capacitors to discharge fully.
Unbox and Inspect the Stabilizer
Remove the stabilizer from its packaging and inspect it thoroughly:
-
Check the housing for cracks, dents, or damage from shipping
-
Verify that the meter, switches, indicator lights, and buttons are intact
-
Ensure all wiring terminals are clean and undamaged
-
Confirm that the unit’s rated voltage matches your home’s supply
If the stabilizer was transported in cold conditions, let it sit at room temperature for several hours before installation to prevent condensation from forming inside the unit.
Mount the Stabilizer Securely
Using screws, mounting brackets, or anchors appropriate for your wall type, secure the stabilizer to the wall or mounting surface. Ensure that:
-
The unit is level and does not wobble
-
The mounting hardware can support the full weight of the unit
-
The stabilizer is positioned with adequate clearance on all sides for ventilation
For floor-standing units, place them on a flat, stable, horizontal surface.
Identify the Terminals
On the back or inside the terminal cover of a single-phase stabilizer, you will typically find five connection points:
| Terminal Label | Purpose | Wire Type |
|---|---|---|
| L (Input) or LIVE IN | Connect to the incoming live wire from your mains supply | Brown or red |
| N (Input) or NEUTRAL IN | Connect to the incoming neutral wire from your mains supply | Blue or black |
| PE or GROUND | Connect to the earth/ground wire for safety | Green/yellow |
| L (Output) or LIVE OUT | Connect to the live wire going to your appliances | Brown or red |
| N (Output) or NEUTRAL OUT | Connect to the neutral wire going to your appliances | Blue or black |
Note: Terminal labeling may vary by manufacturer. Always refer to the specific labels on your unit and the user manual.
Connect the Ground Wire First
Always connect the grounding wire first. Attach the green/yellow earth wire to the PE terminal. Proper grounding is essential for safety—it protects you from electric shock if a fault occurs inside the stabilizer. The grounding resistance should be 4Ω or less. Never connect the ground wire to water pipes, gas pipes, or other utilities.
Connect the Input Wires
Connect the incoming live and neutral wires from your main power supply to the input terminals of the stabilizer. Ensure that:
-
The wire gauge is sufficient for the current rating of the stabilizer
-
All terminal screws are firmly tightened to prevent loose connections that can cause overheating
-
The exposed conductor length is appropriate—typically 8–10 mm of bare wire
Connect the Output Wires
Connect the wires going to your home’s distribution panel or to your protected appliances to the output terminals (L and N) of the stabilizer. Double-check that you have not reversed input and output connections—connecting the stabilizer backwards can damage the unit.
Double-Check All Connections
Before restoring power, visually inspect every connection:
-
Are all terminal screws tight?
-
Is the ground wire securely connected?
-
Are there any loose strands of wire that could cause a short circuit?
-
Is the terminal cover back in place?
For guidance on specific stabilizer series and their terminal configurations, explore our power solutions for residential applications.
Power-Up and Testing Procedure
After completing all connections, follow this sequence to power up the system safely:
- With no load connected, switch on the main power supply, then turn on the stabilizer’s power switch.
- Observe the indicator lights and the voltmeter display. The output voltage should stabilize at the correct level within a few seconds.
- Verify the output voltage using the built-in meter or a separate multimeter. Confirm that the voltage reading is within the expected range before connecting any load.
- Connect the load. After confirming a stable output voltage, turn on your appliances or switch on the downstream circuit breakers one at a time. Monitor the stabilizer’s display for any signs of overload.
- Check for unusual sounds or smells. A properly functioning servo stabilizer will produce a low hum during operation. Grinding noises, excessive vibration, or burning smells indicate a problem—turn off the unit immediately and inspect.
Common Installation Mistakes to Avoid
Even experienced DIYers can make errors. Here are the most common mistakes and how to avoid them:
- Overloading the stabilizer. Connecting appliances that exceed the unit’s rated capacity causes overheating, reduced performance, and eventual failure. Always leave a safety margin—at least 20–30% above your calculated load.
- Using undersized wires. Wires that are too thin for the current they carry will heat up, creating a fire hazard and causing voltage drop that reduces the stabilizer’s effectiveness. Follow the manufacturer’s wire gauge recommendations.
- Poor ventilation. Installing the stabilizer in a confined space without adequate airflow shortens its lifespan and can cause overheating failures.
- Incorrect input/output polarity. Swapping live and neutral, or reversing input and output, can damage the unit and create safety hazards. Always follow the terminal markings.
- Skipping the ground connection. An ungrounded stabilizer provides no protection against electric shock in the event of an internal fault. Never skip grounding.
When to Call a Professional
While installing a small point-of-use stabilizer (plugging a device into a wall outlet) is straightforward, whole-house installations involve working inside your main electrical panel. If any of the following apply to you, hire a licensed electrician:
-
You are unsure about any step in this guide
-
Your home has older wiring that may not meet current codes
-
You need to install a bypass switch or rewire your distribution board
-
You are uncomfortable working with live electrical circuits
A professional electrician can also perform a power quality audit to measure the actual voltage fluctuations at your home, helping you select the optimal stabilizer capacity and type.
Next Steps – From Installation to Ongoing Maintenance
Once your stabilizer is installed and operating, regular maintenance will keep it running reliably for years. Periodically inspect cables and connections for wear or damage. Keep the unit clean and ensure ventilation openings are not blocked. For servo-type stabilizers, the carbon brush and spring mechanism may require periodic inspection—refer to your user manual for specific maintenance intervals.
Now that you understand the installation process, comparing specific stabilizer models and their features becomes the next logical step. You can review single-phase automatic voltage stabilizer series for whole-house protection, or explore portable point-of-use stabilizers for individual appliance protection.
For a related selection guide, see our article: How to Choose the Right Capacity for Your Home Voltage Stabilizer – coming soon.
Related Reading
-
How to Calculate the Correct kVA Rating for Your Home Voltage Stabilizer
-
Whole-House vs Point-of-Use Voltage Stabilizers – Which Is Right for You?
-
Understanding Input Voltage Range and Why It Matters for Your Home
-
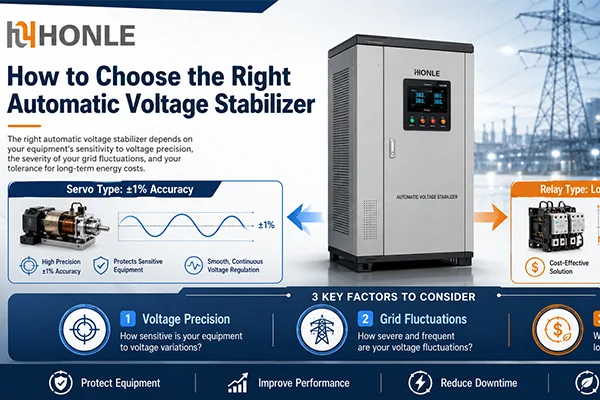
Servo vs Relay Voltage Stabilizer – Which Type Is Best for Residential Use?
-
Common Signs Your Voltage Stabilizer Needs Maintenance or Replacement
This article is part of Honle’s technical content library. No direct sales or pricing information is included. All technical discussions aim to help you make informed purchasing decisions.